
StackCare Web Portal Entra Configuration
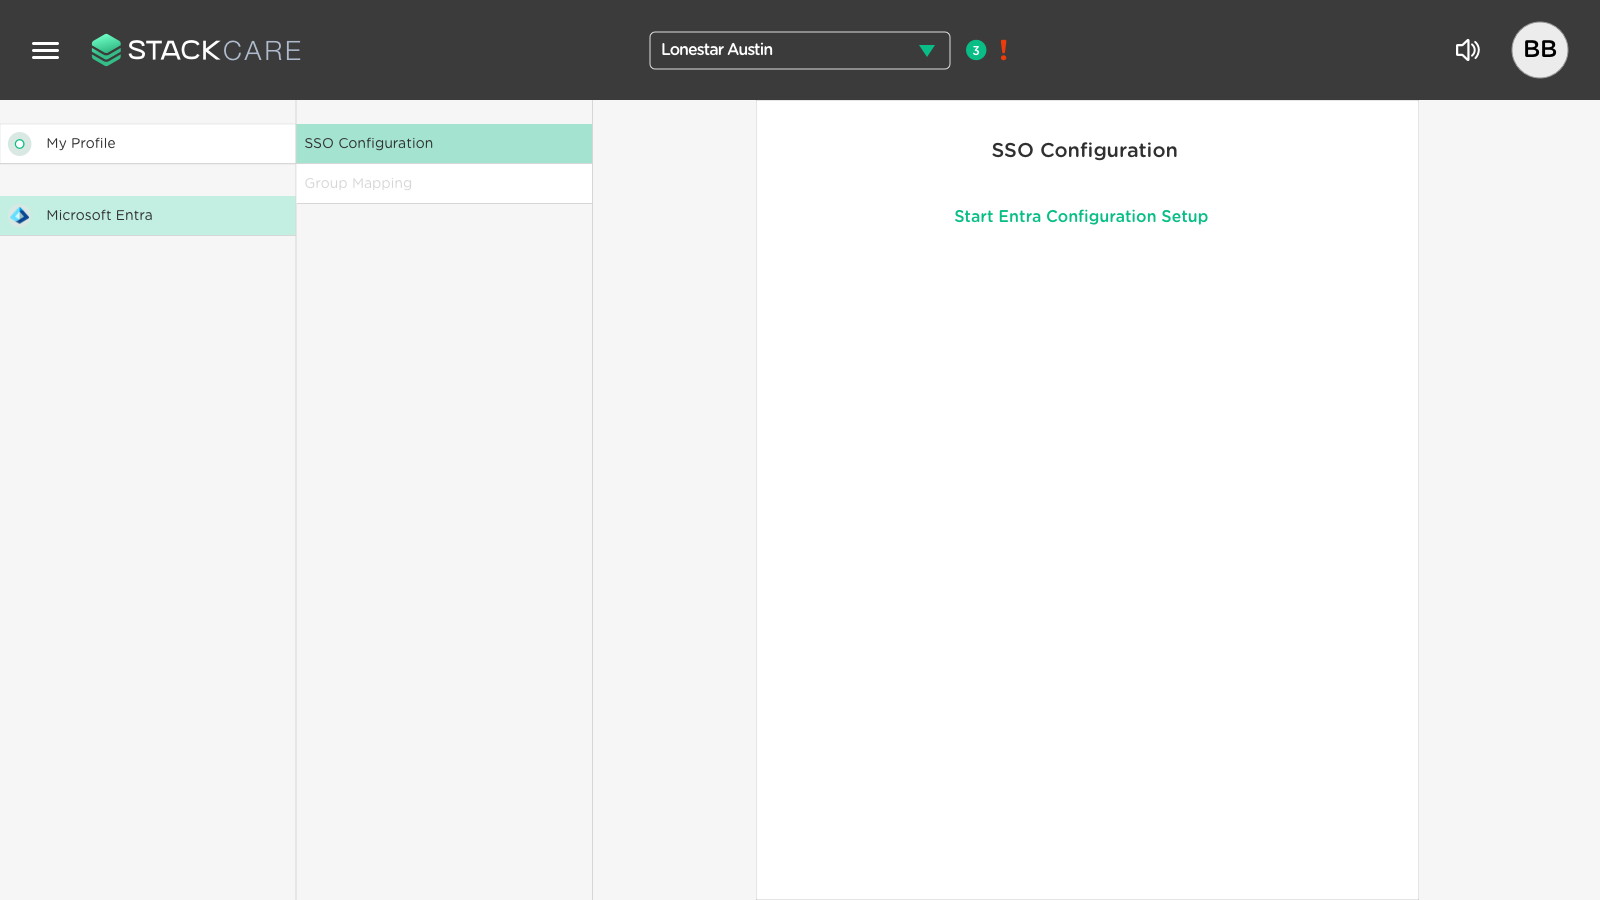
Start the Entra Configuration Setup in the StackCare Web Portal.
- Select your organization in the dropdown menu.
- Navigate to the Organization Settings page and select Microsoft Entra.
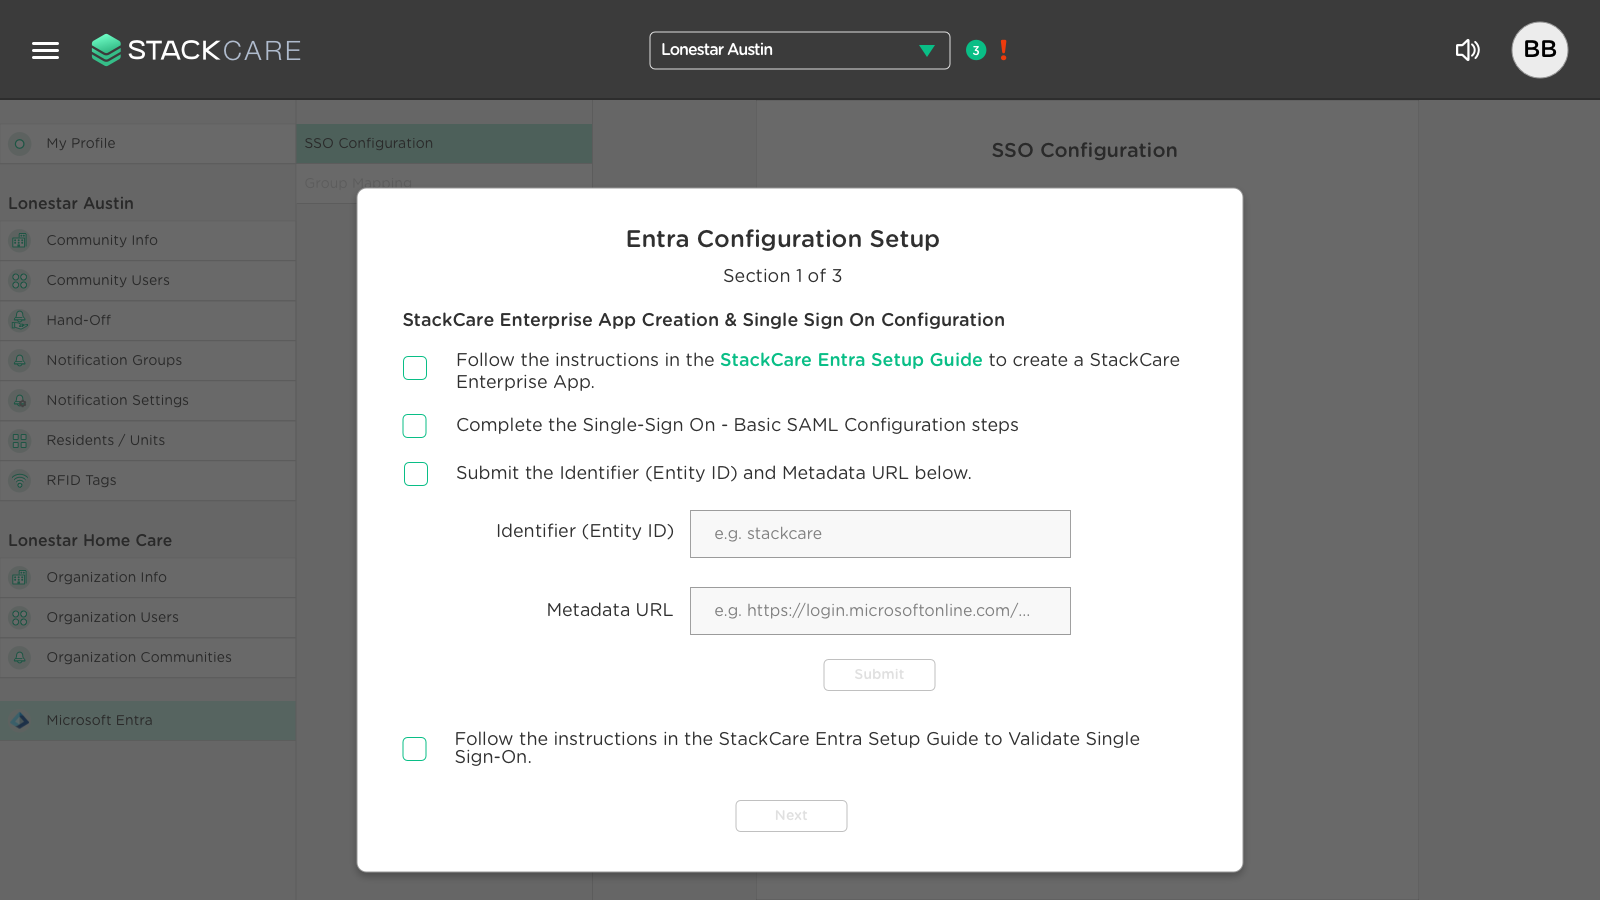
- Proceed with the steps in the first section focusing on Entra Enterprise App creation and SSO configuration.
Create a StackCare Enterprise App within Microsoft Entra
-
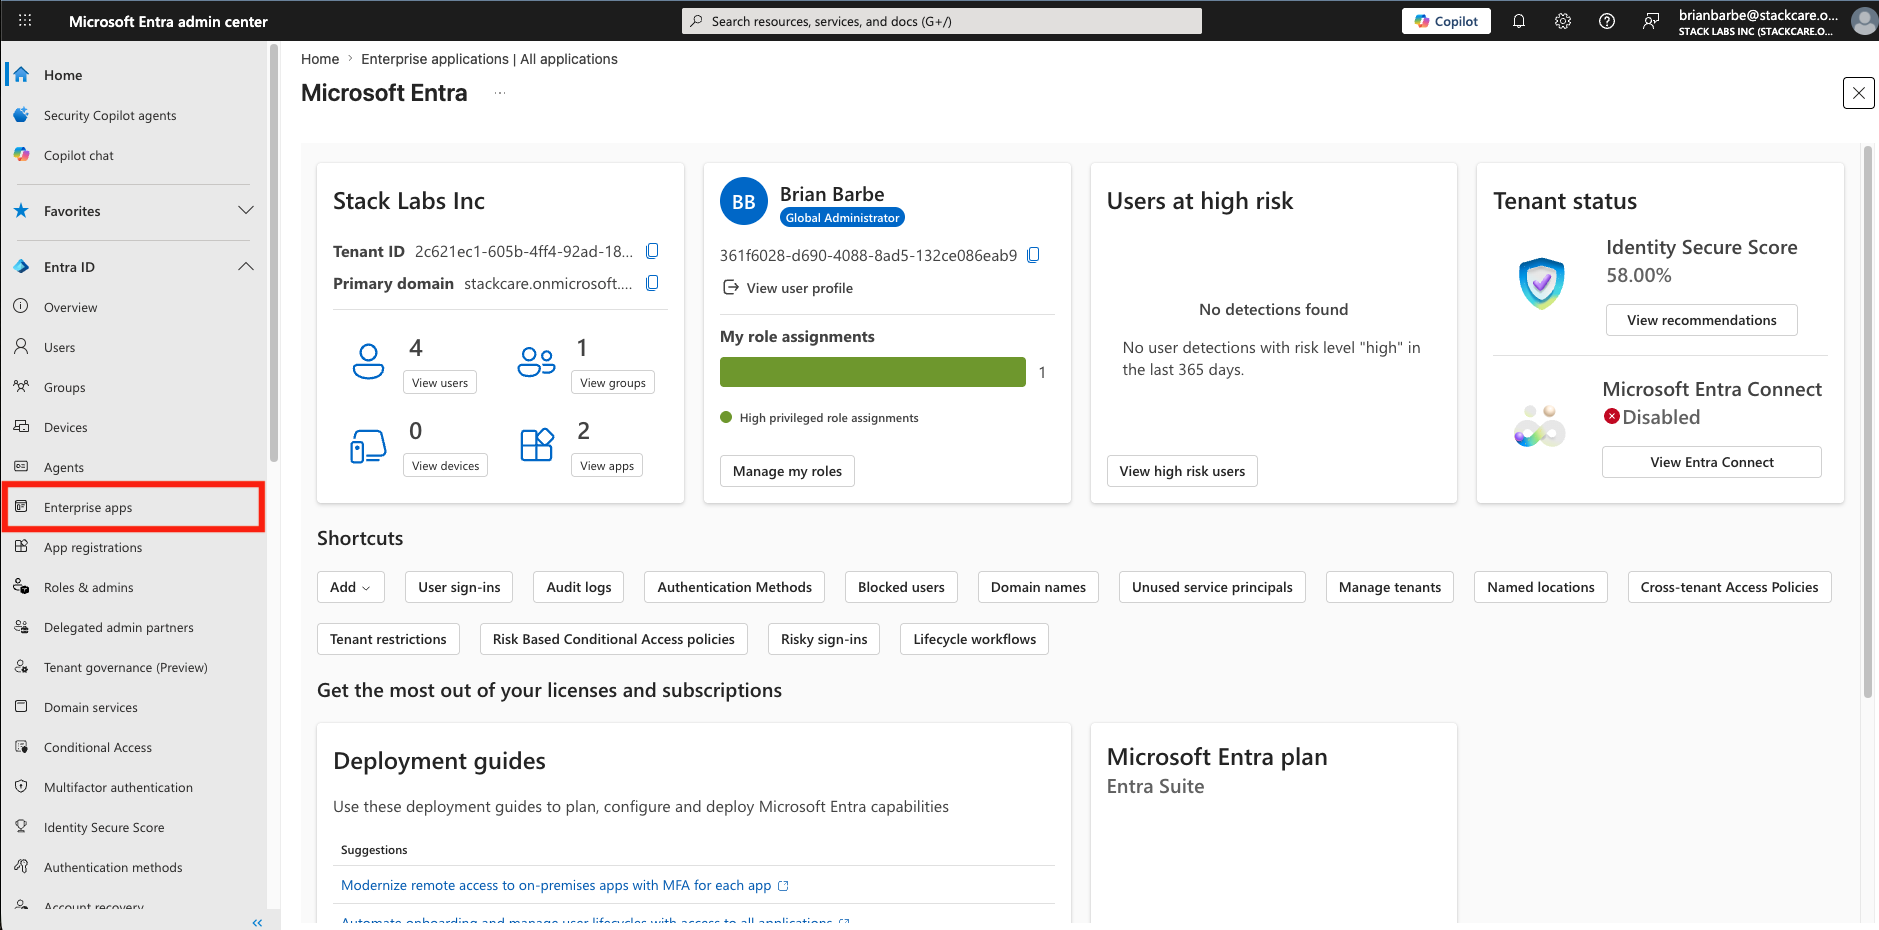
Select Enterprise apps in the Microsoft Entra navigation panel.
-
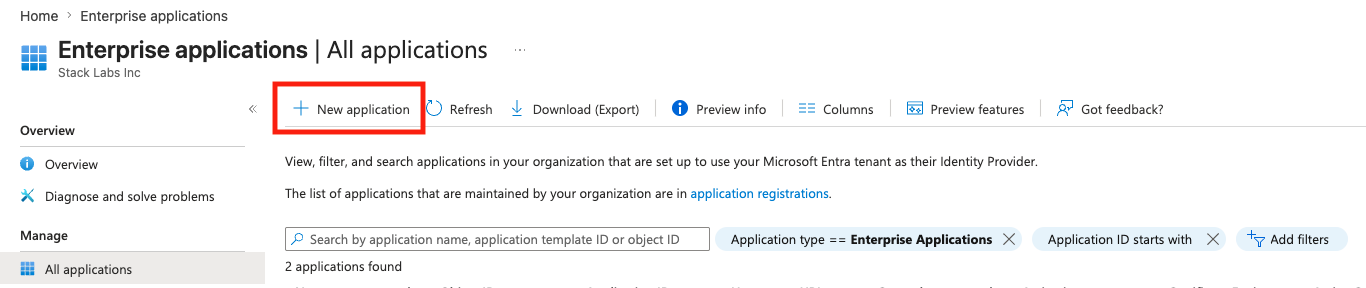
Click New application at the top.
-
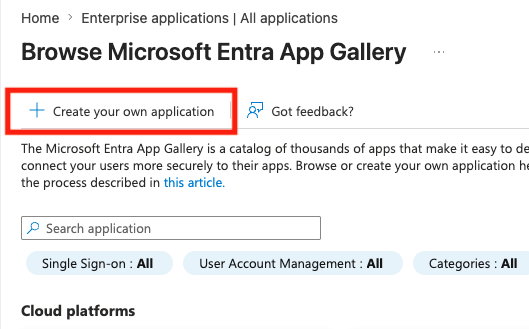
Click Create your own application.
-
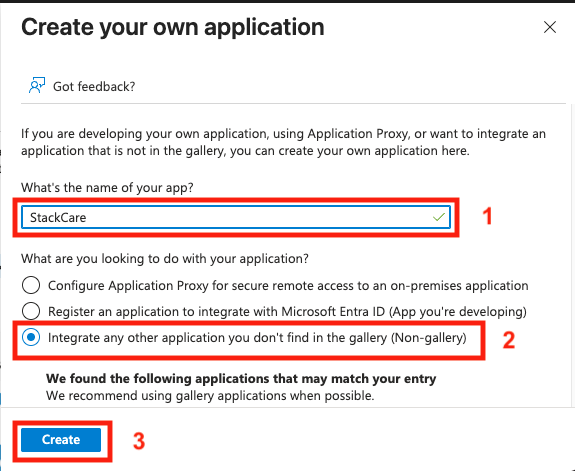
Enter StackCare as the app name, select Integrate any other application you don't find in the gallery (Non-gallery), then click Create.
-
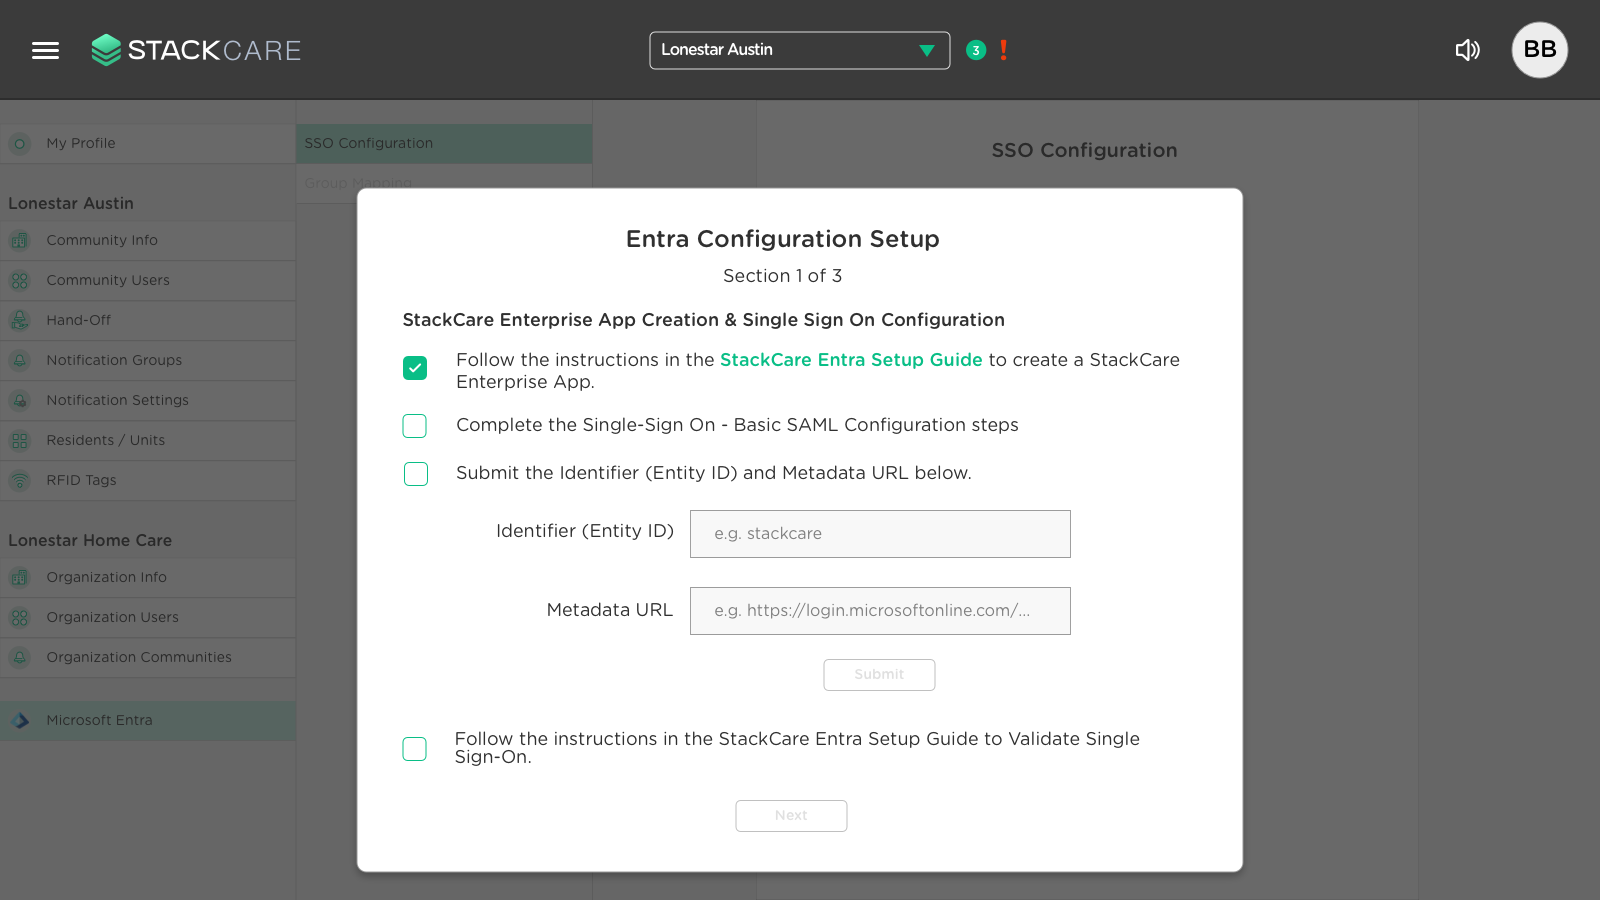
With the StackCare Enterprise App created, check the box back in the Entra Configuration Setup window and move on to the next step.
Single Sign-On - Basic SAML Configuration
-
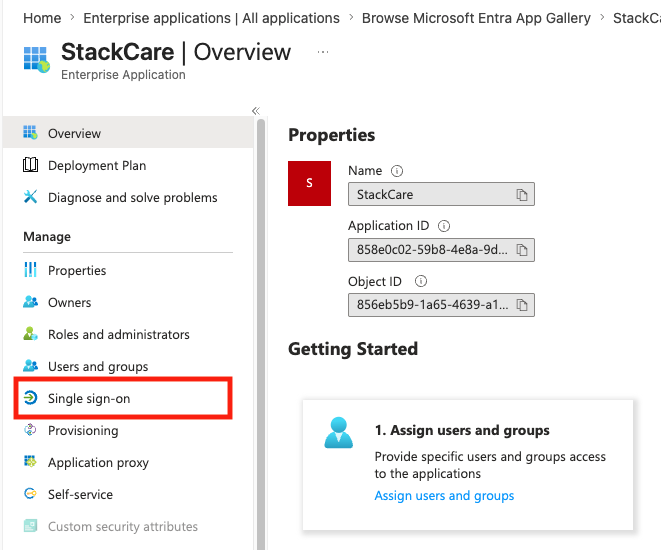
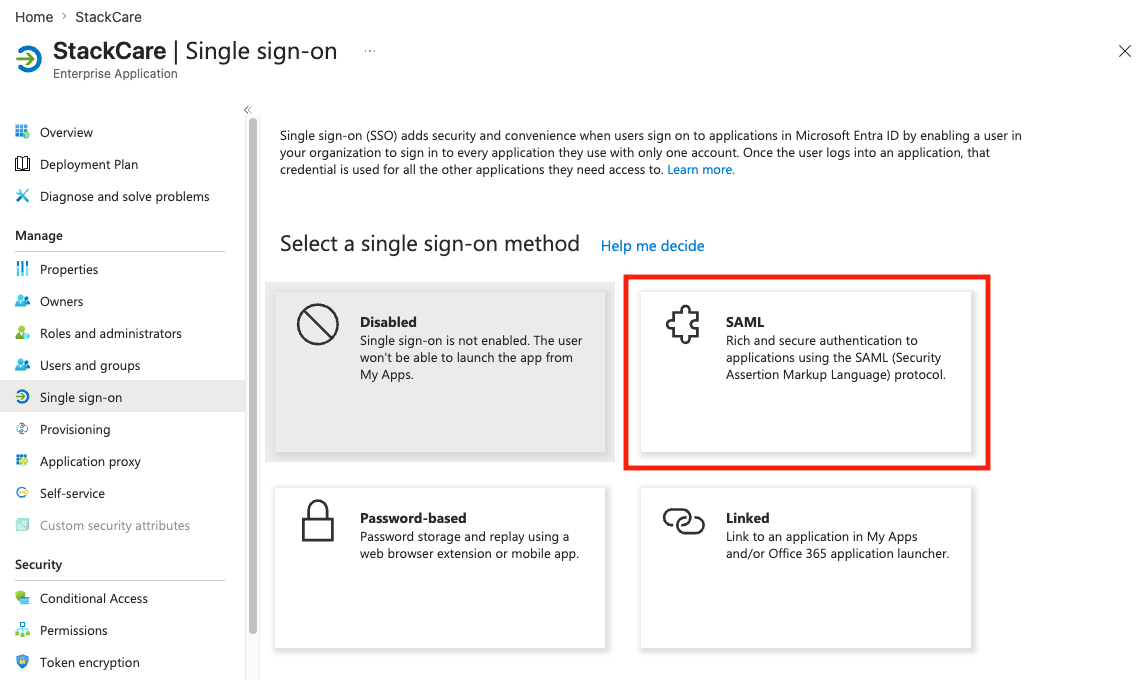
Select Single sign-on in the Enterprise App navigation.
-
Select the SAML sign-on method.
-
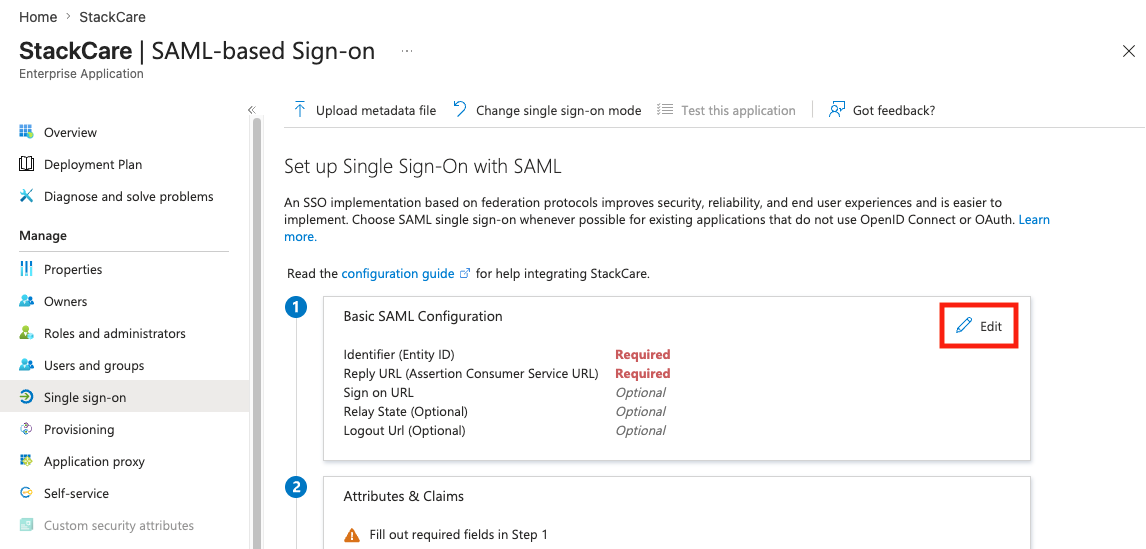
In the Basic SAML Configuration pane, tap the Edit button.
-
Click Add identifier and enter
stackcare(or another identifier). Click Add reply URL and enterhttps://api.stack.care/auth/saml/acs. Leave the other fields blank.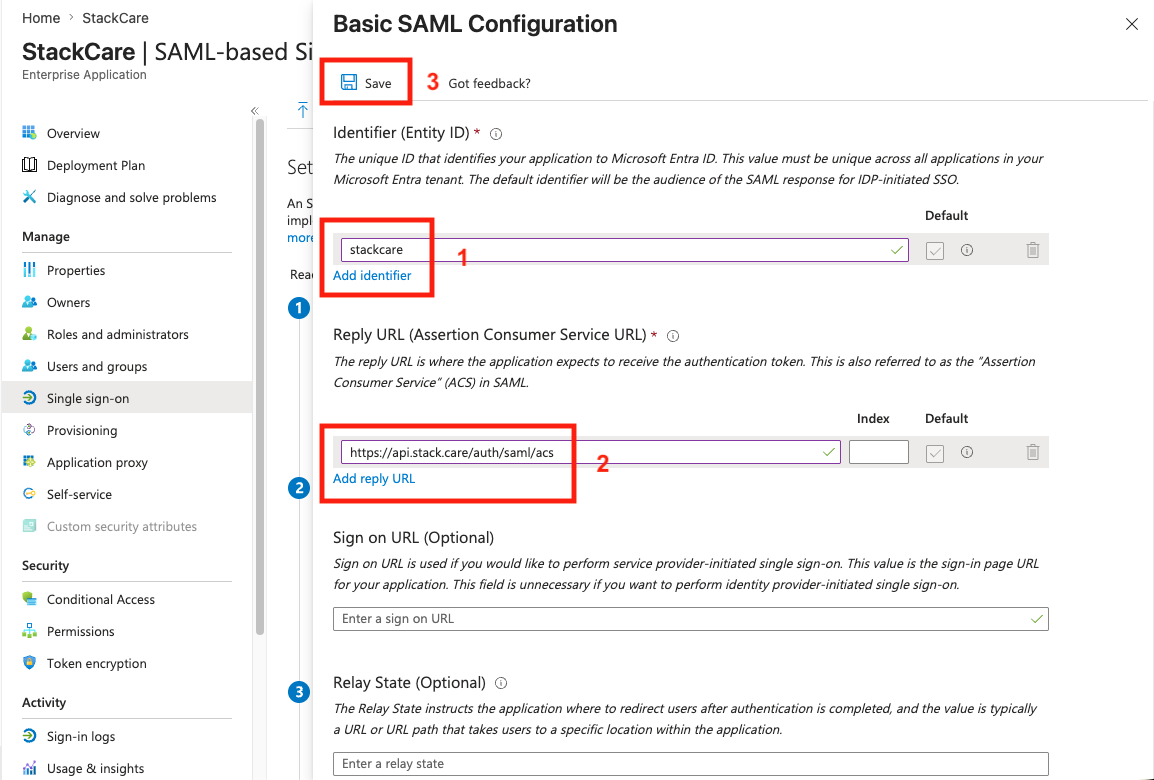
- Once saved, close the Basic SAML Configuration pane and continue.
-
Back on the Entra Configuration Setup window, check the box for Basic SAML Configuration and proceed to the next step.
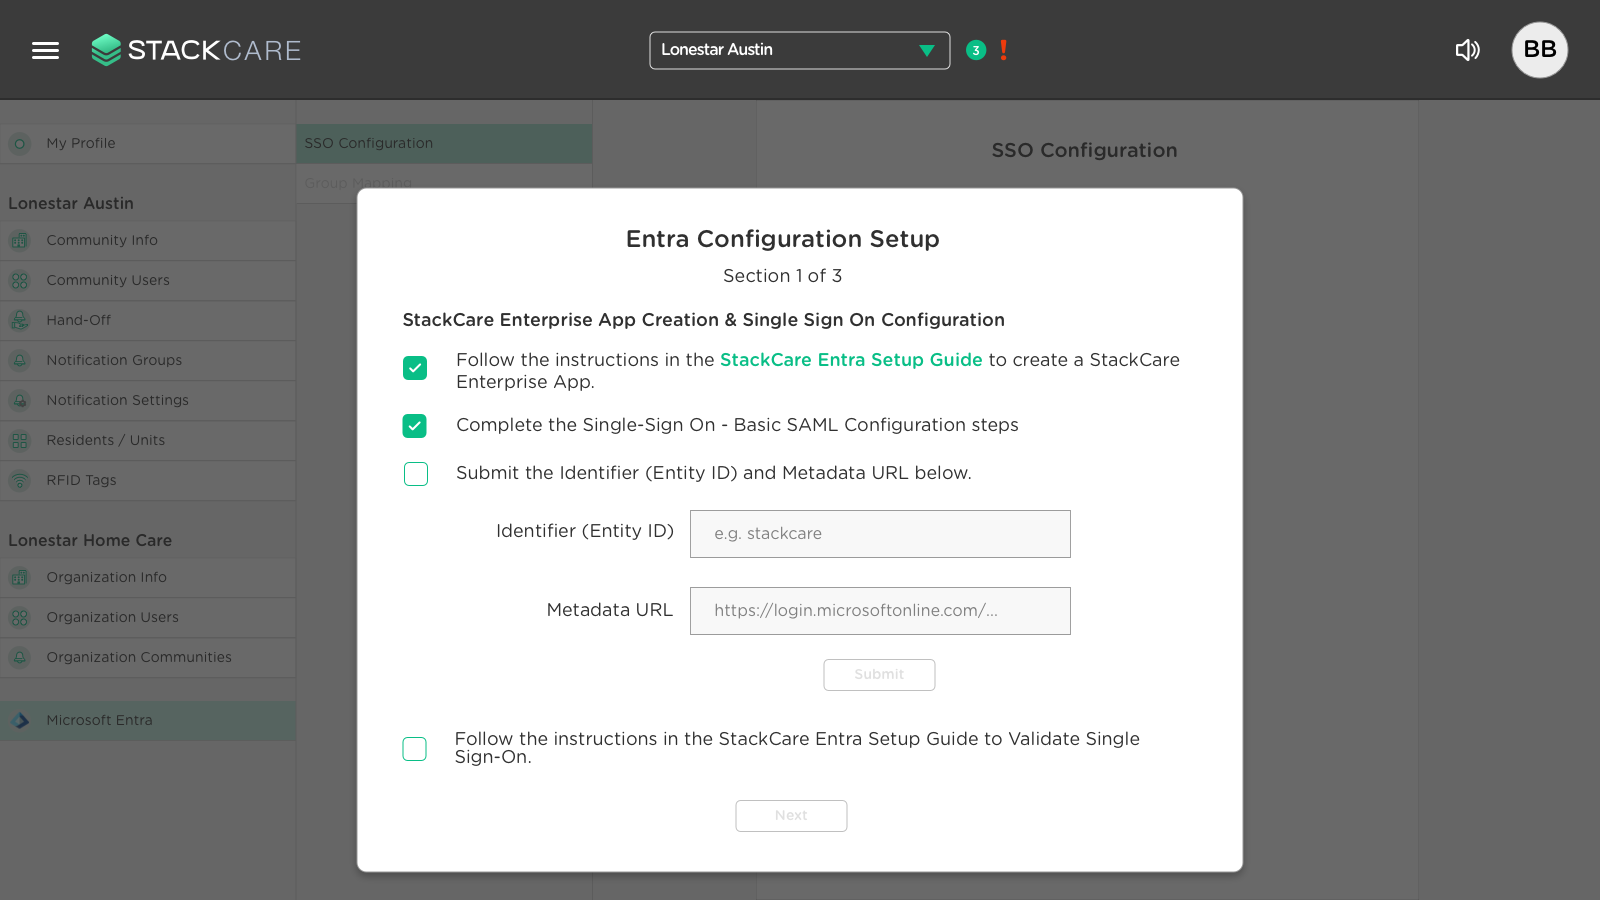
Submit Identifier (EntityID) and App Federation Metadata URL
-
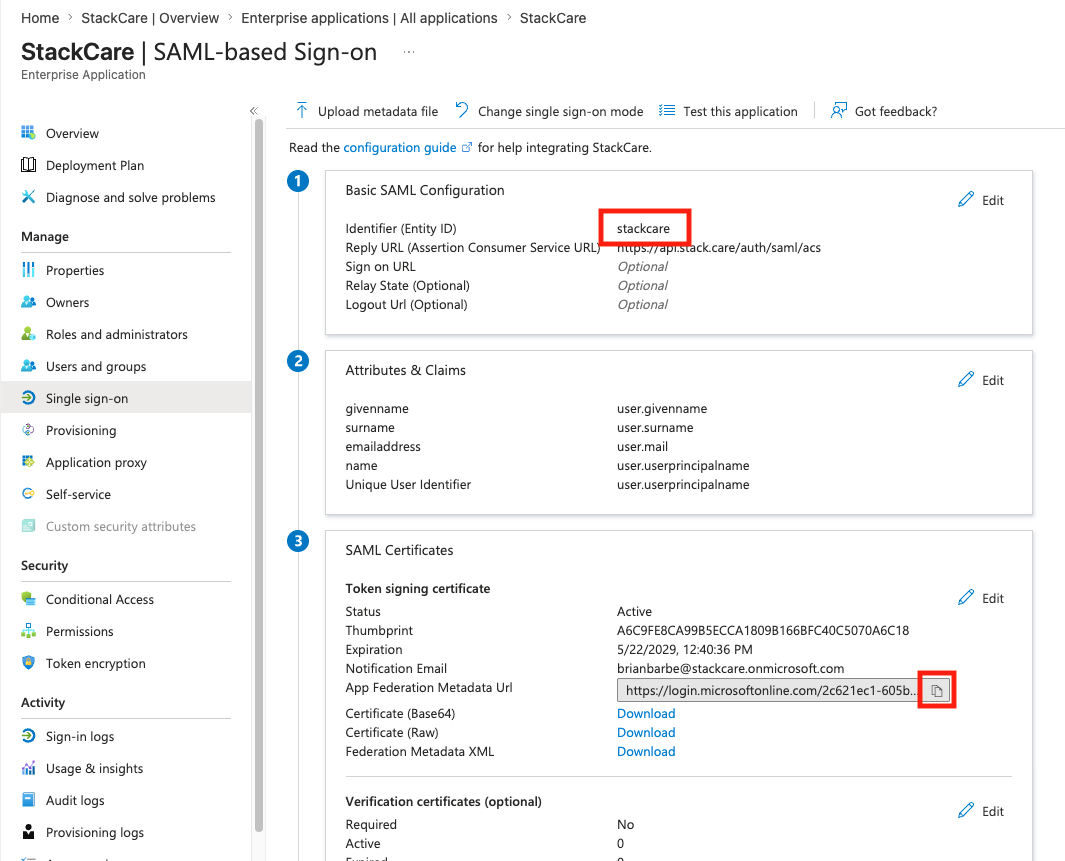
Note the identifier saved in Basic SAML Configuration and copy the App Federation Metadata URL.
-
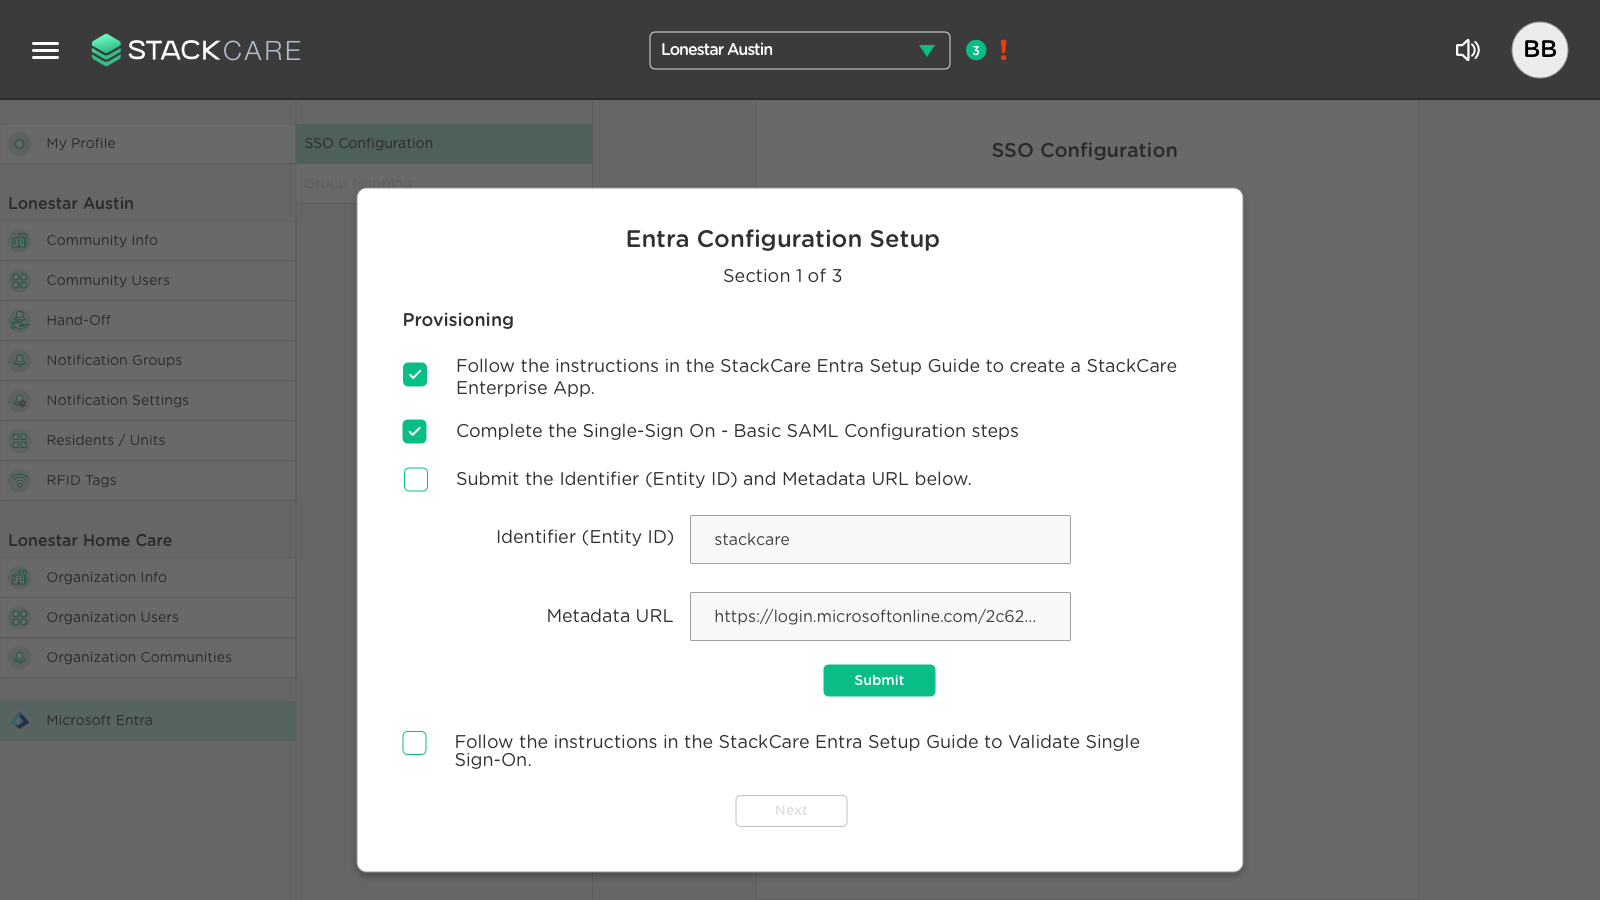
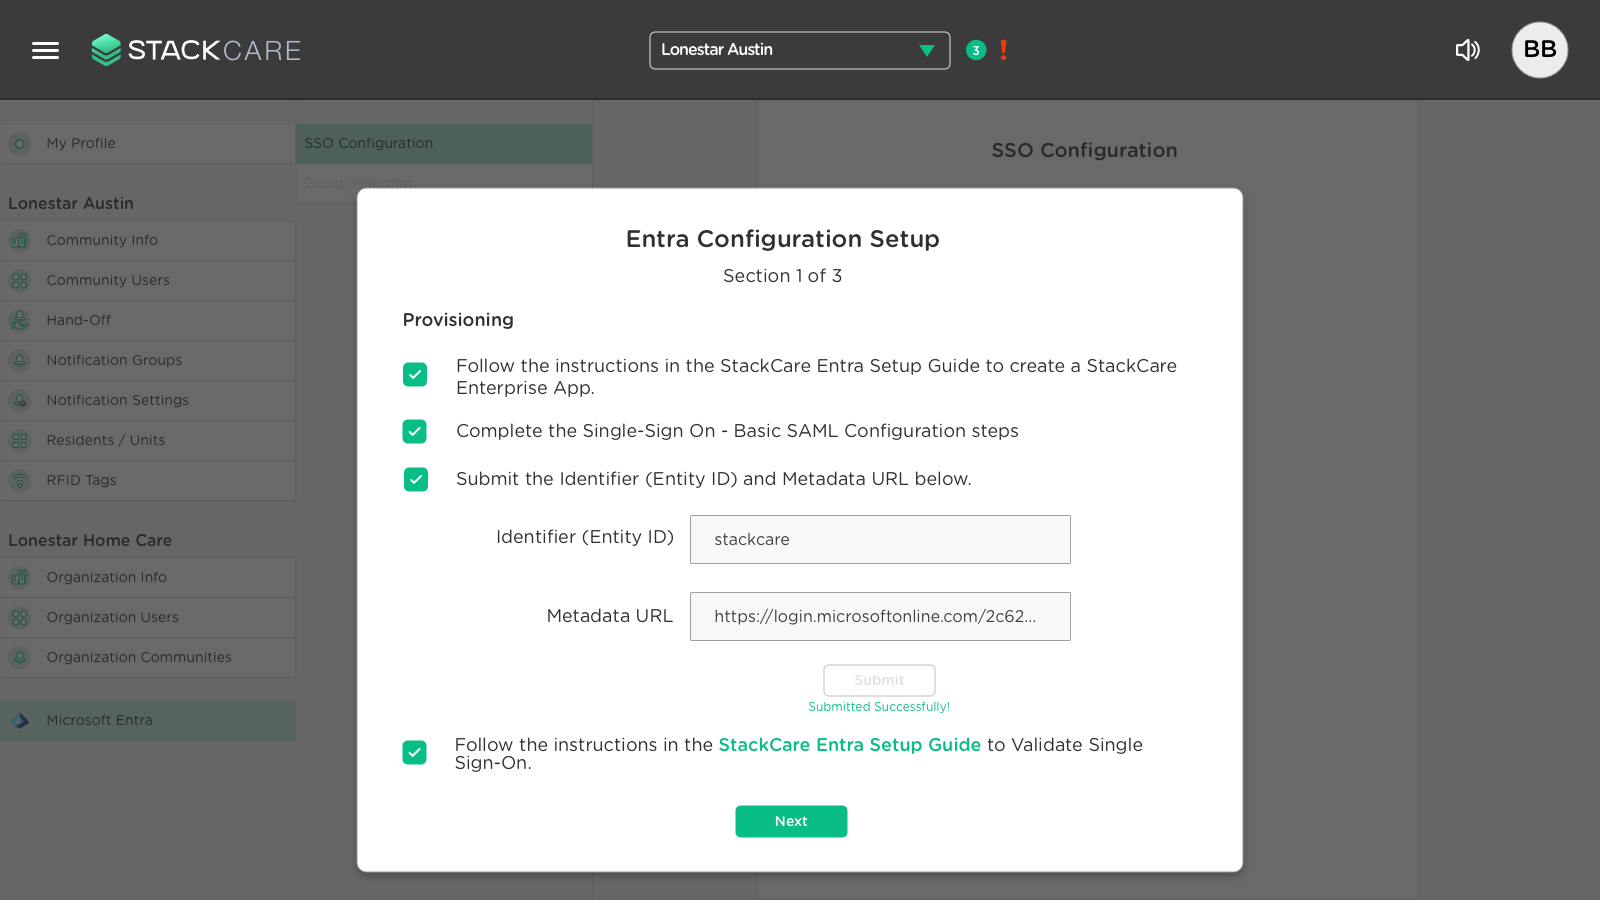
Enter the Enterprise App Identifier (Entity ID) and App Federation Metadata URL in the StackCare Entra Configuration window, then click Submit.
-
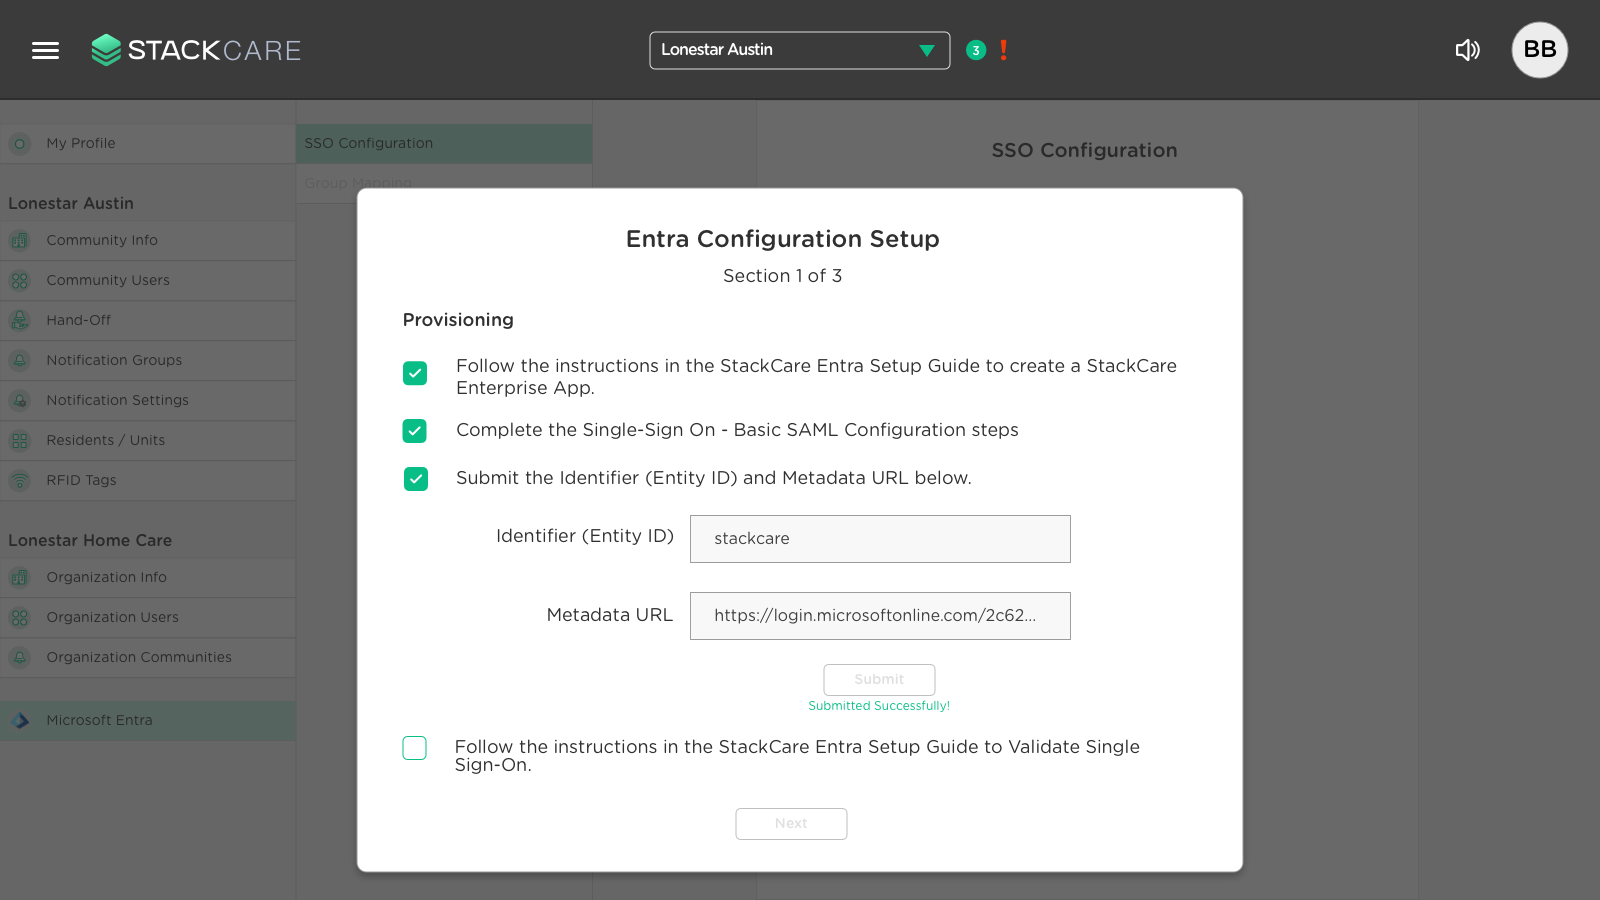
You should see a Submitted Successfully! message.
Validate Single Sign-On
-
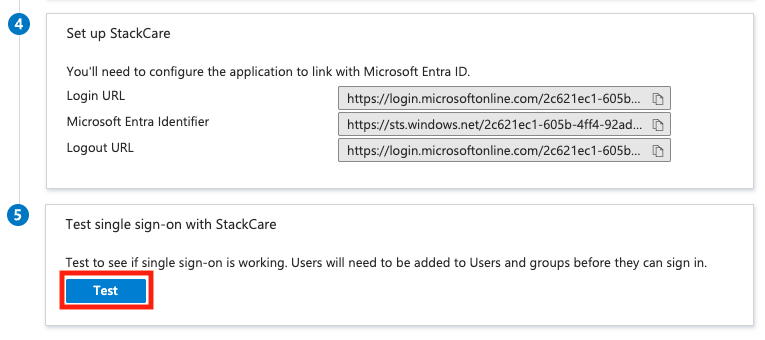
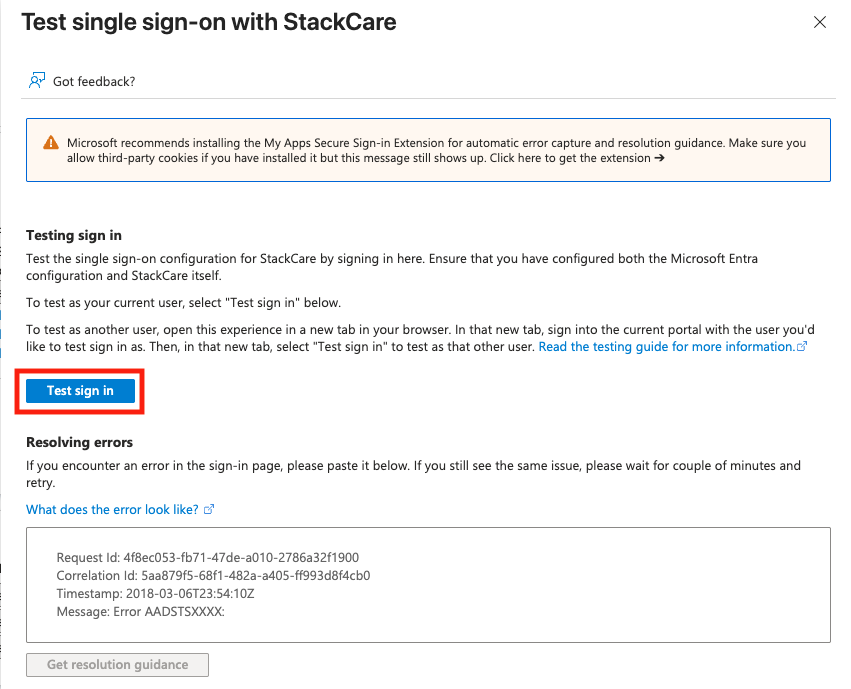
Use the Test button at the bottom of Single Sign-On.
-
In the right panel, click Test sign in.
-
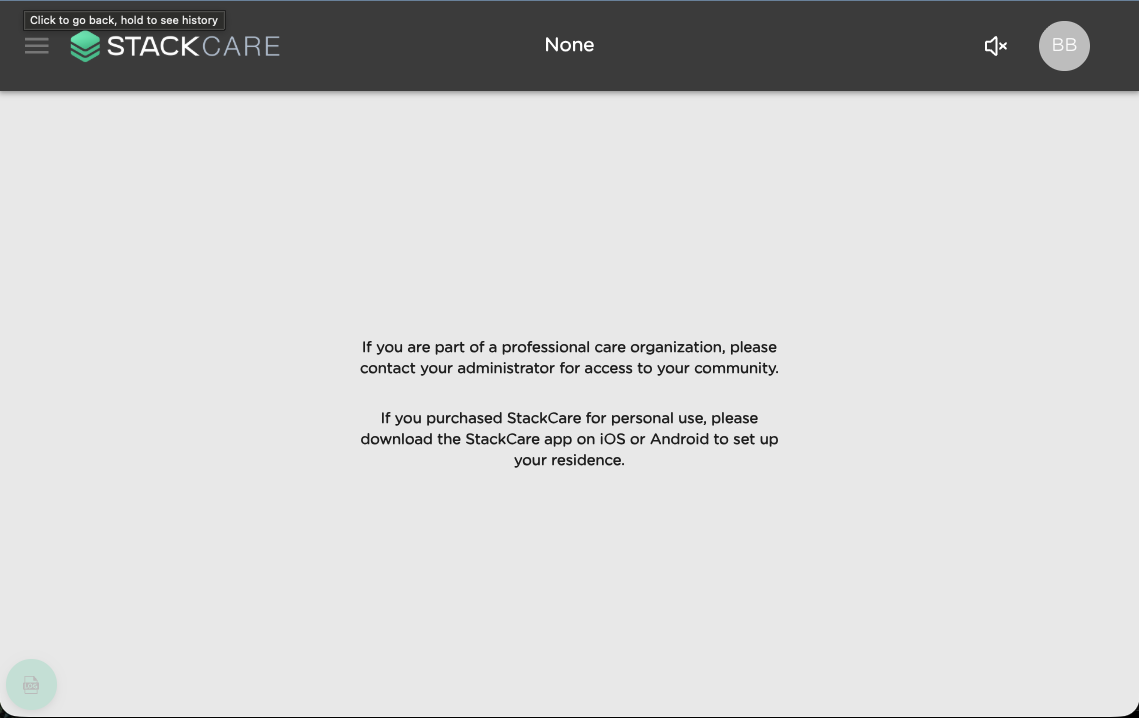
Successful authentication should redirect to the StackCare web portal.
If group-role association is not set yet, you may not have access to a community.
-
In the Entra Configuration Setup, check the final validation step for Section 1 and click Next.
Enterprise App Provisioning
-
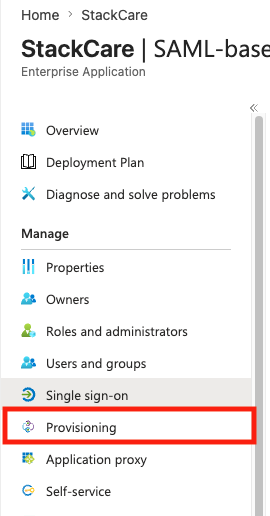
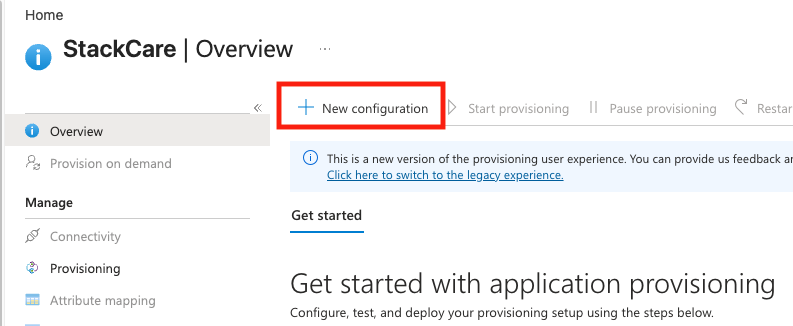
Select the Provisioning option in the StackCare Enterprise Application navigation panel.
-
Click the New configuration button at the top.
-
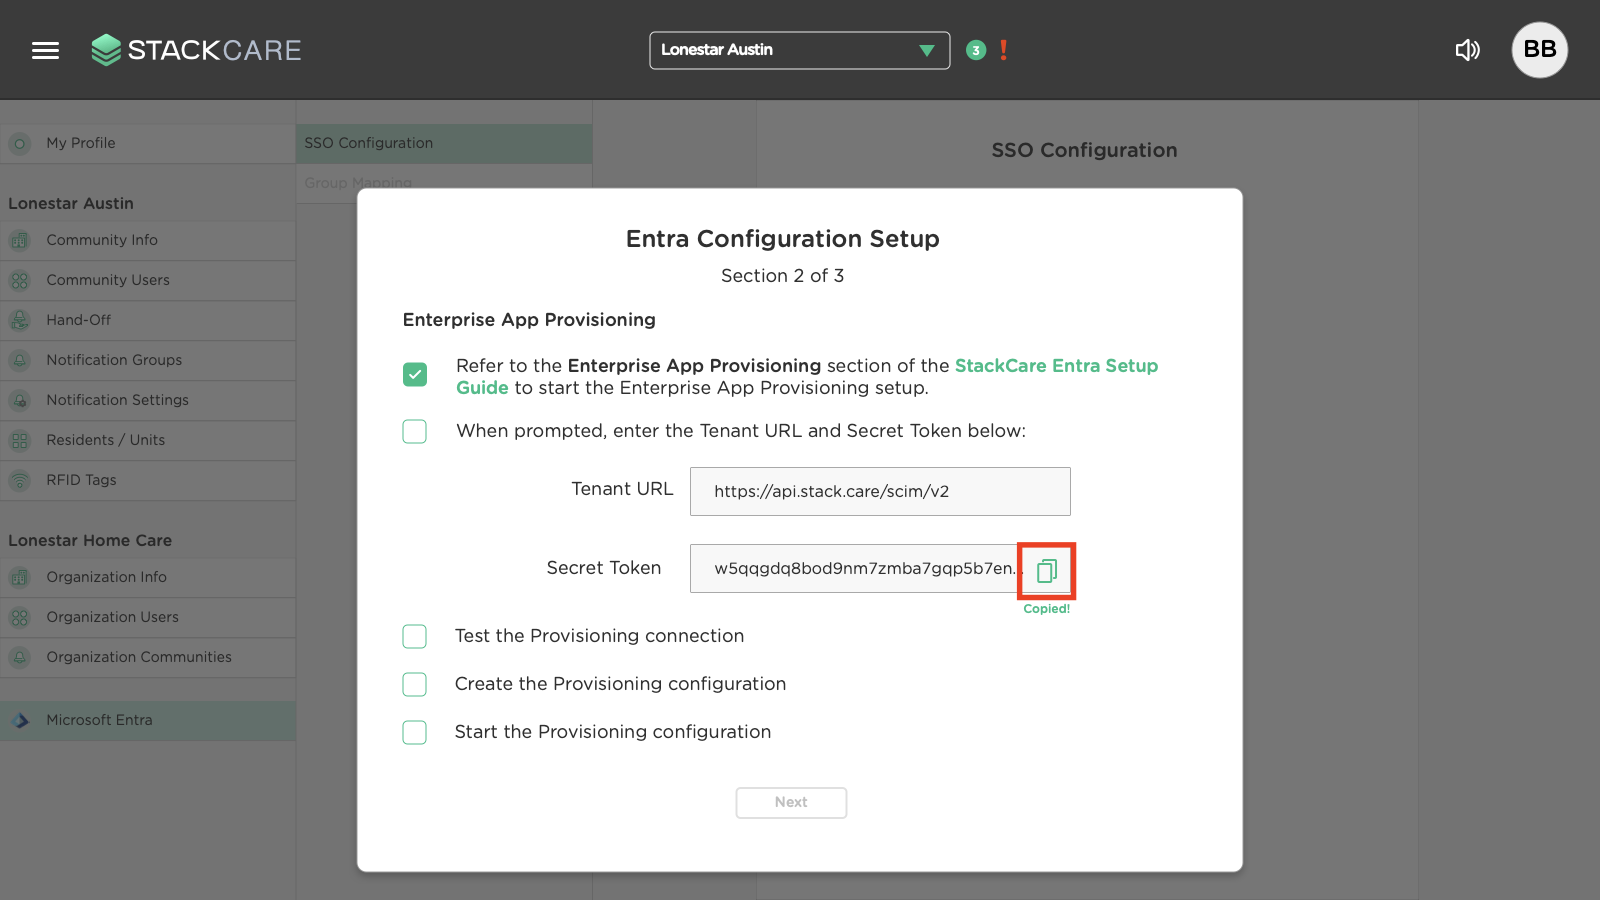
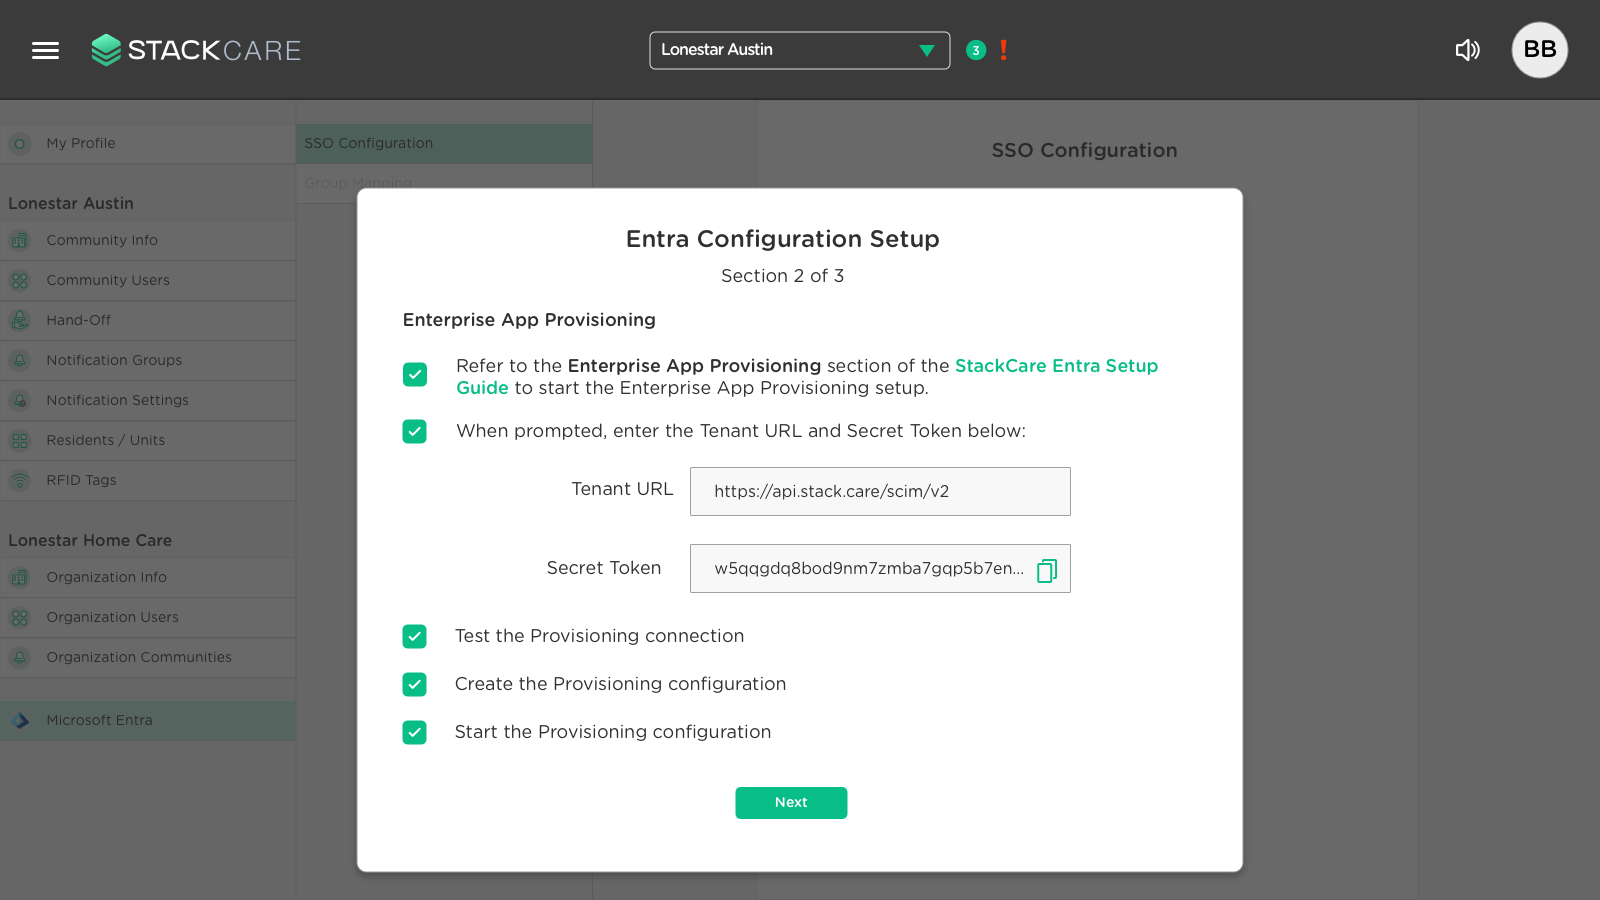
Use the Tenant URL and Secret Token provided in the configuration window.
Use the copy button to copy the full token.
-
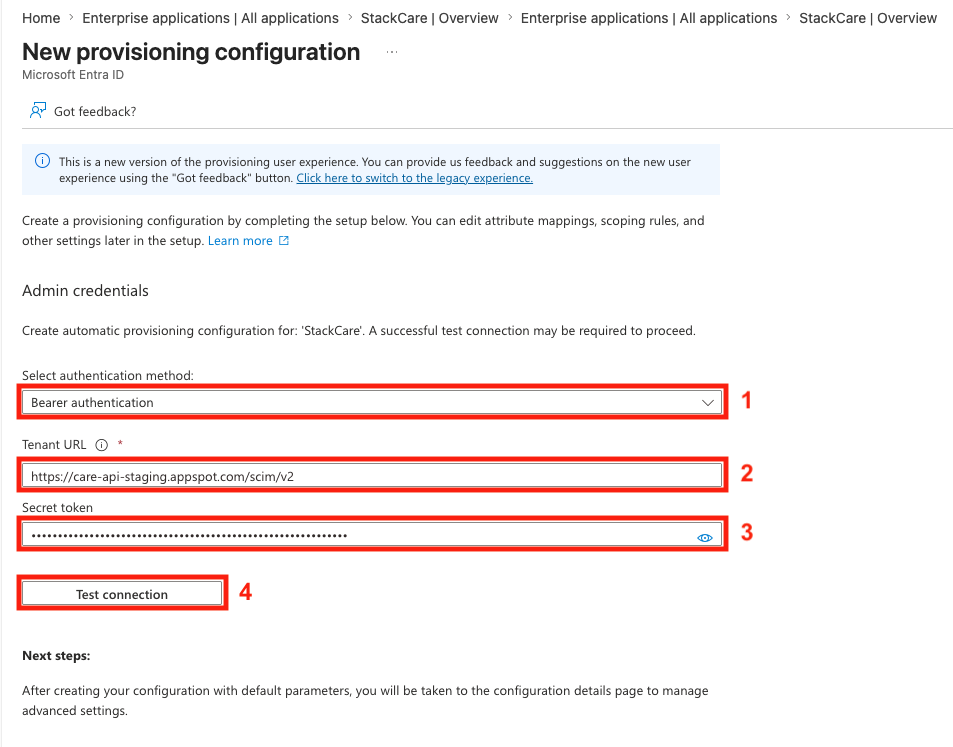
Fill out the New provisioning configuration form:
- Use Bearer authentication.
- Enter the Tenant URL from the configuration window.
- Enter the Secret Token from the configuration window.
-
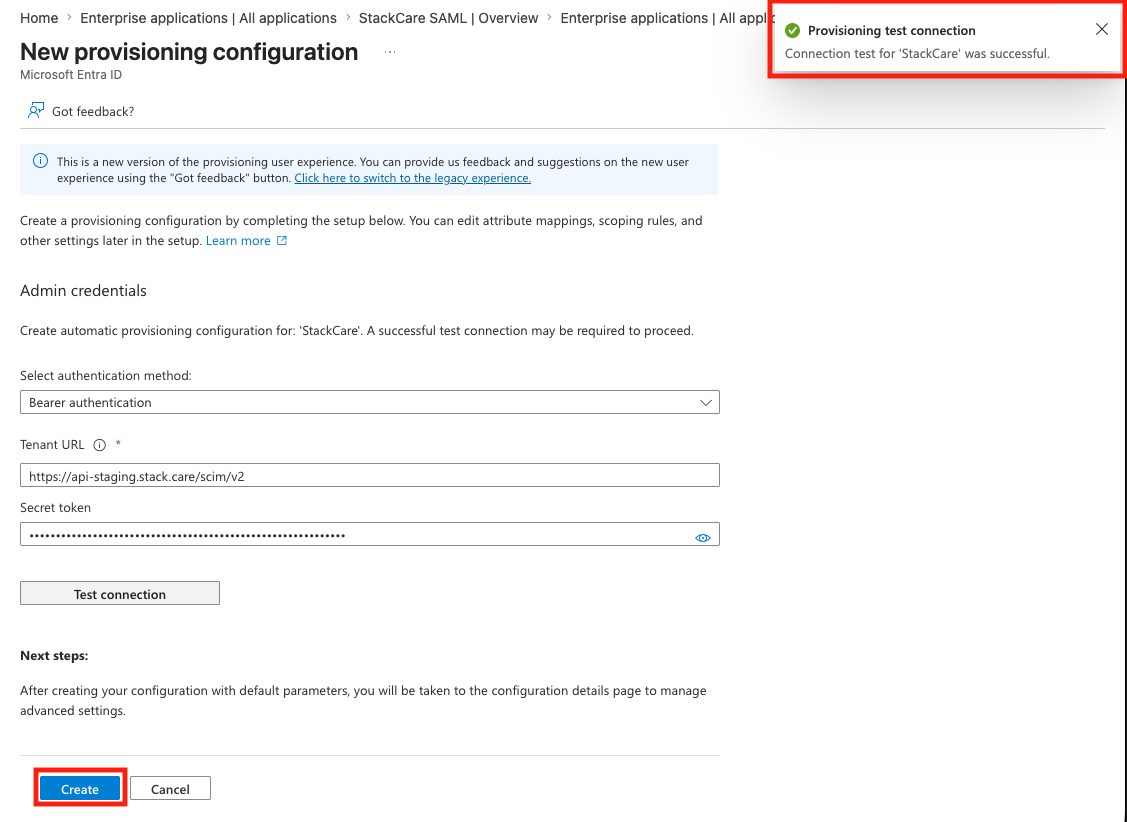
Click the Test connection button.
It should show Connection test for 'StackCare' was successful.
-
Click the Create button.
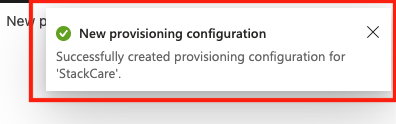
-
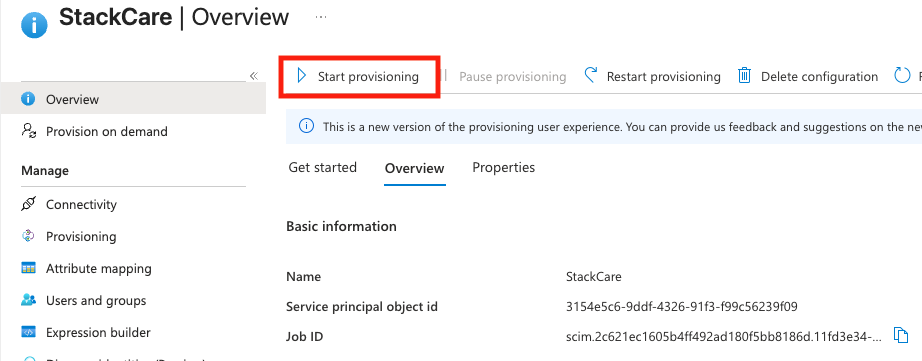
Click Start provisioning to begin synchronization.
Initial sync may take several minutes.
-
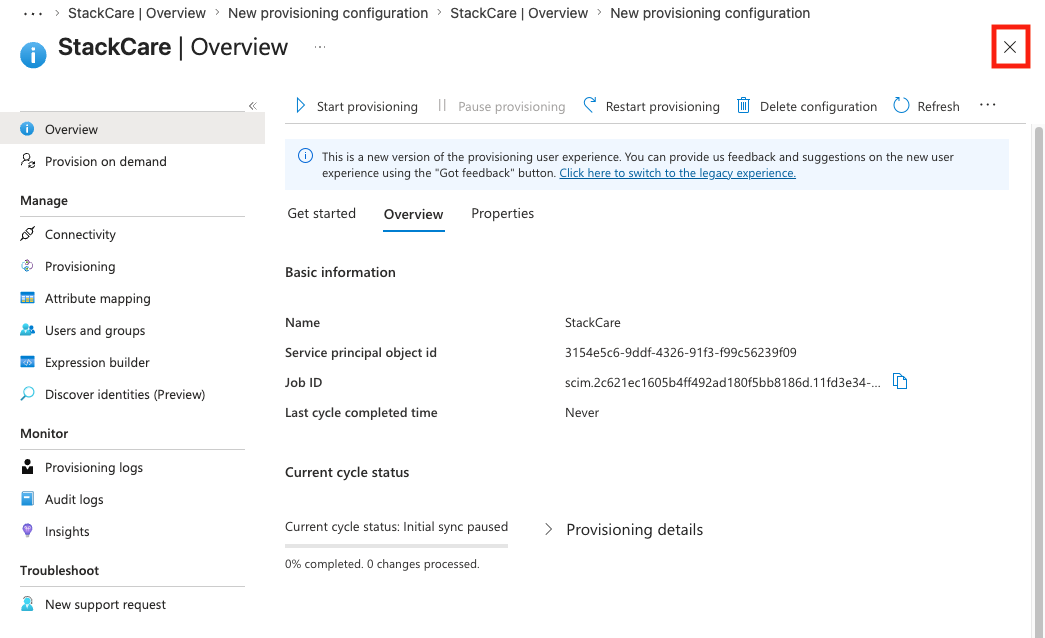
Close the provisioning window using the close button.
-
Check the Test, Create, and Start provisioning boxes in the configuration window and click Next.
Assign Users & Groups
With the Enterprise App created, assign the appropriate users and groups to the StackCare Enterprise App.
StackCare Logo
Optional: upload the StackCare logo for better visibility in Microsoft Entra and My Apps.
-
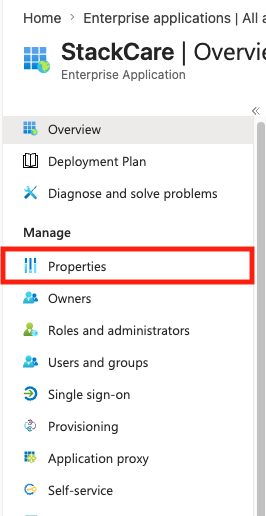
Select Properties in the StackCare Enterprise App navigation.
-
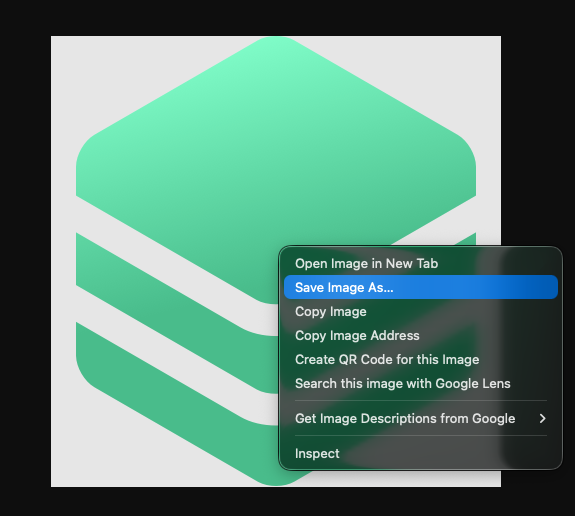
Download the StackCare logo from the URL below, then save it locally.
https://stack.care/s/StackCareLogo.png
-
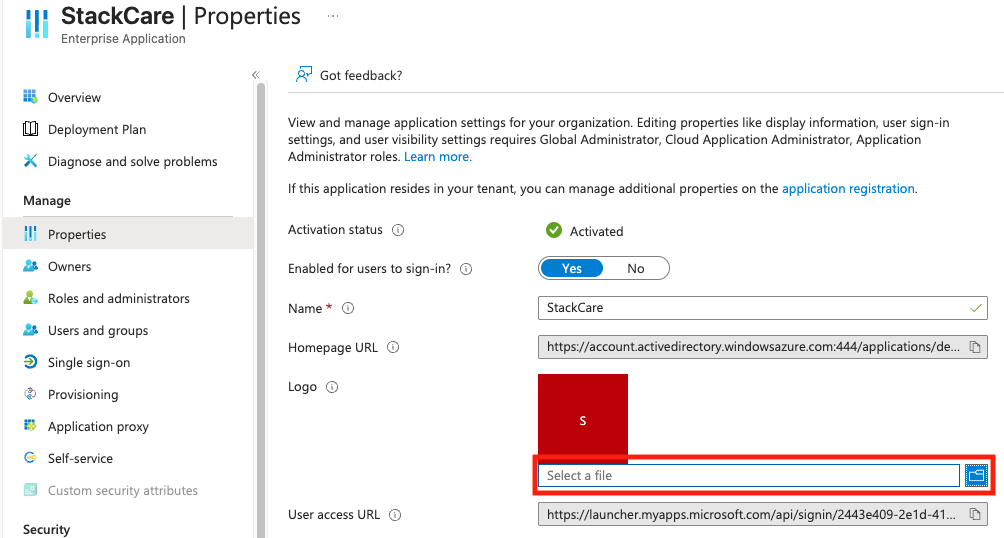
In the Logo section, click the file selector and choose the downloaded StackCare logo.
-
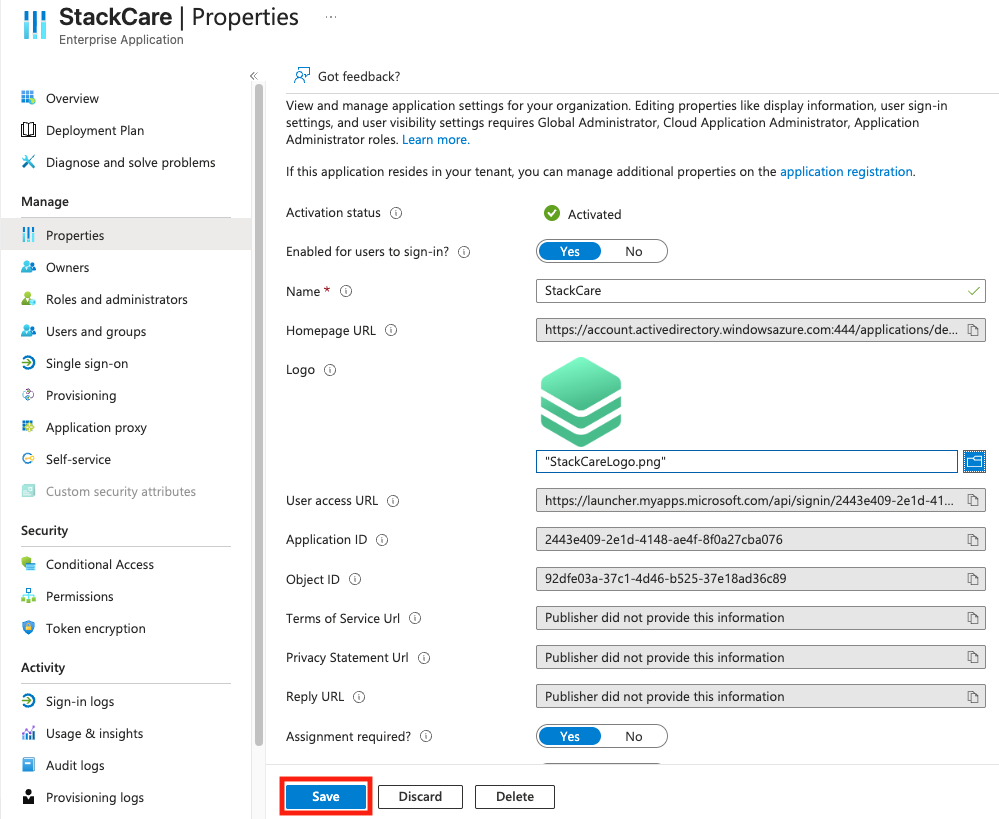
Confirm the StackCare logo appears, then click Save.
-
Check the box and click Done.
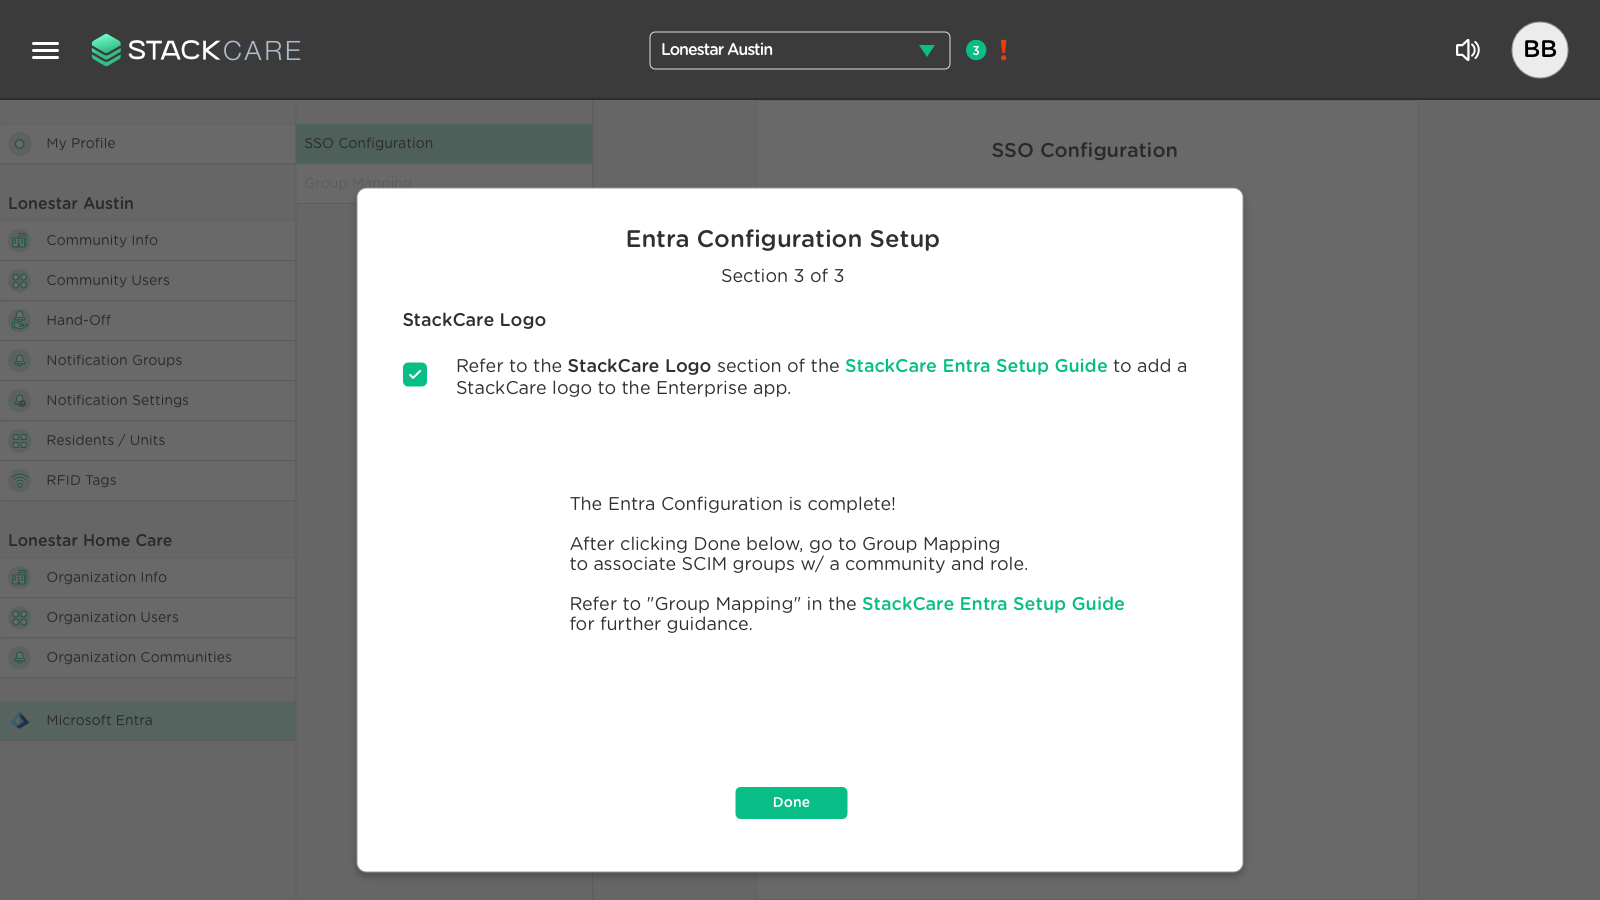 You are now set for SSO configuration. Next, associate Entra groups with the correct StackCare communities and user roles.
Group Mapping
-
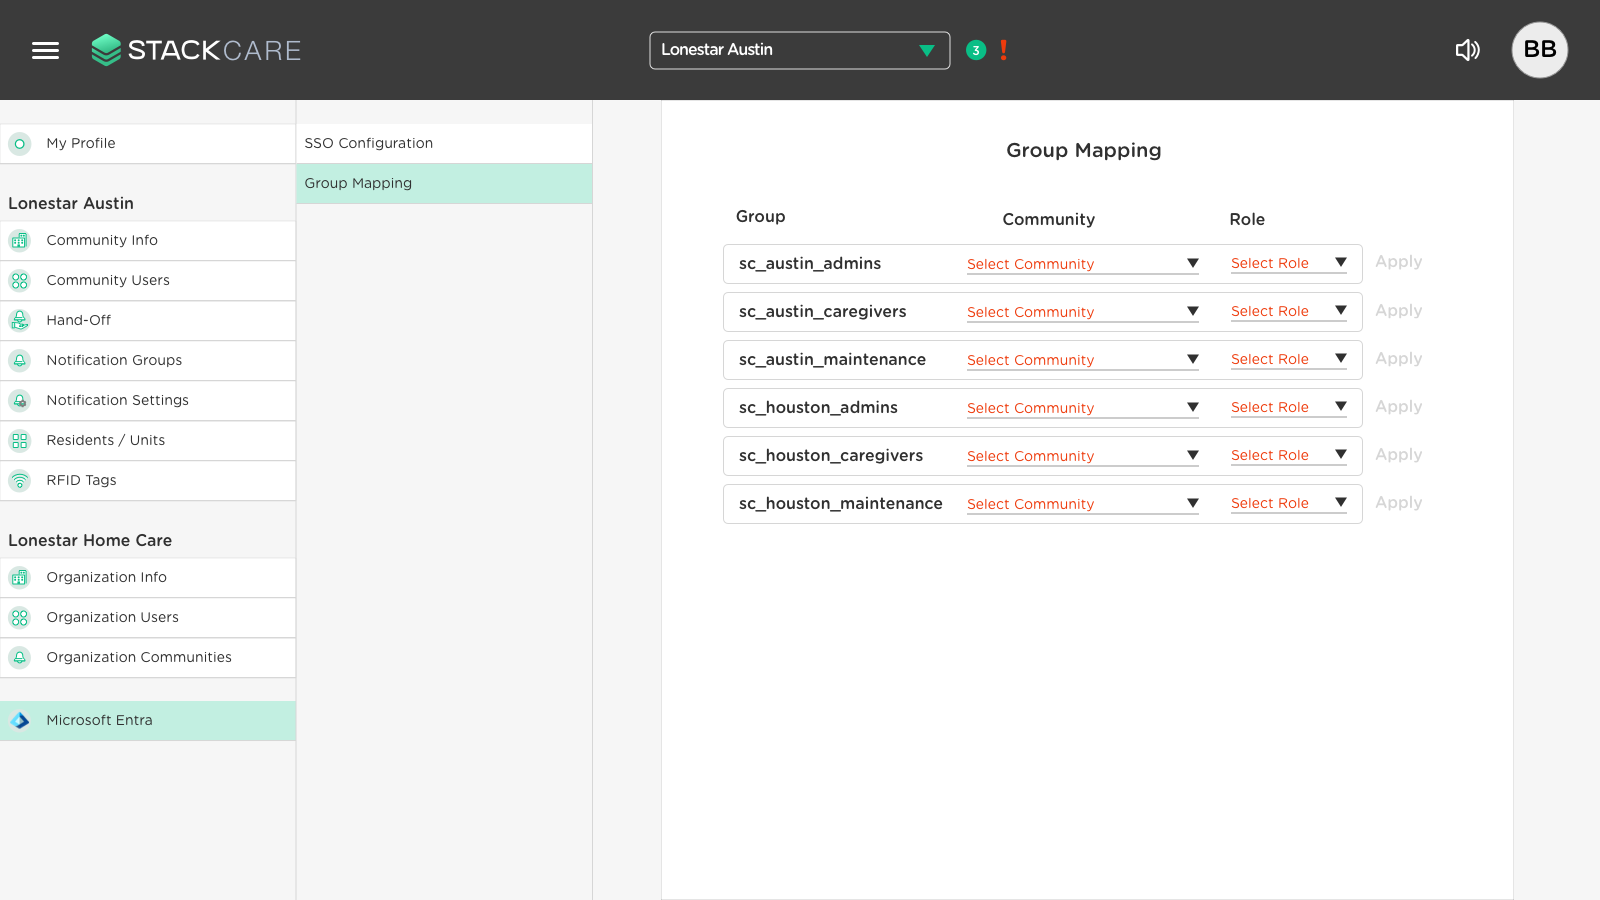
Initially, Entra groups synchronized to StackCare will not have an associated community or user role.
-
For each group member, select the appropriate StackCare community and user role.
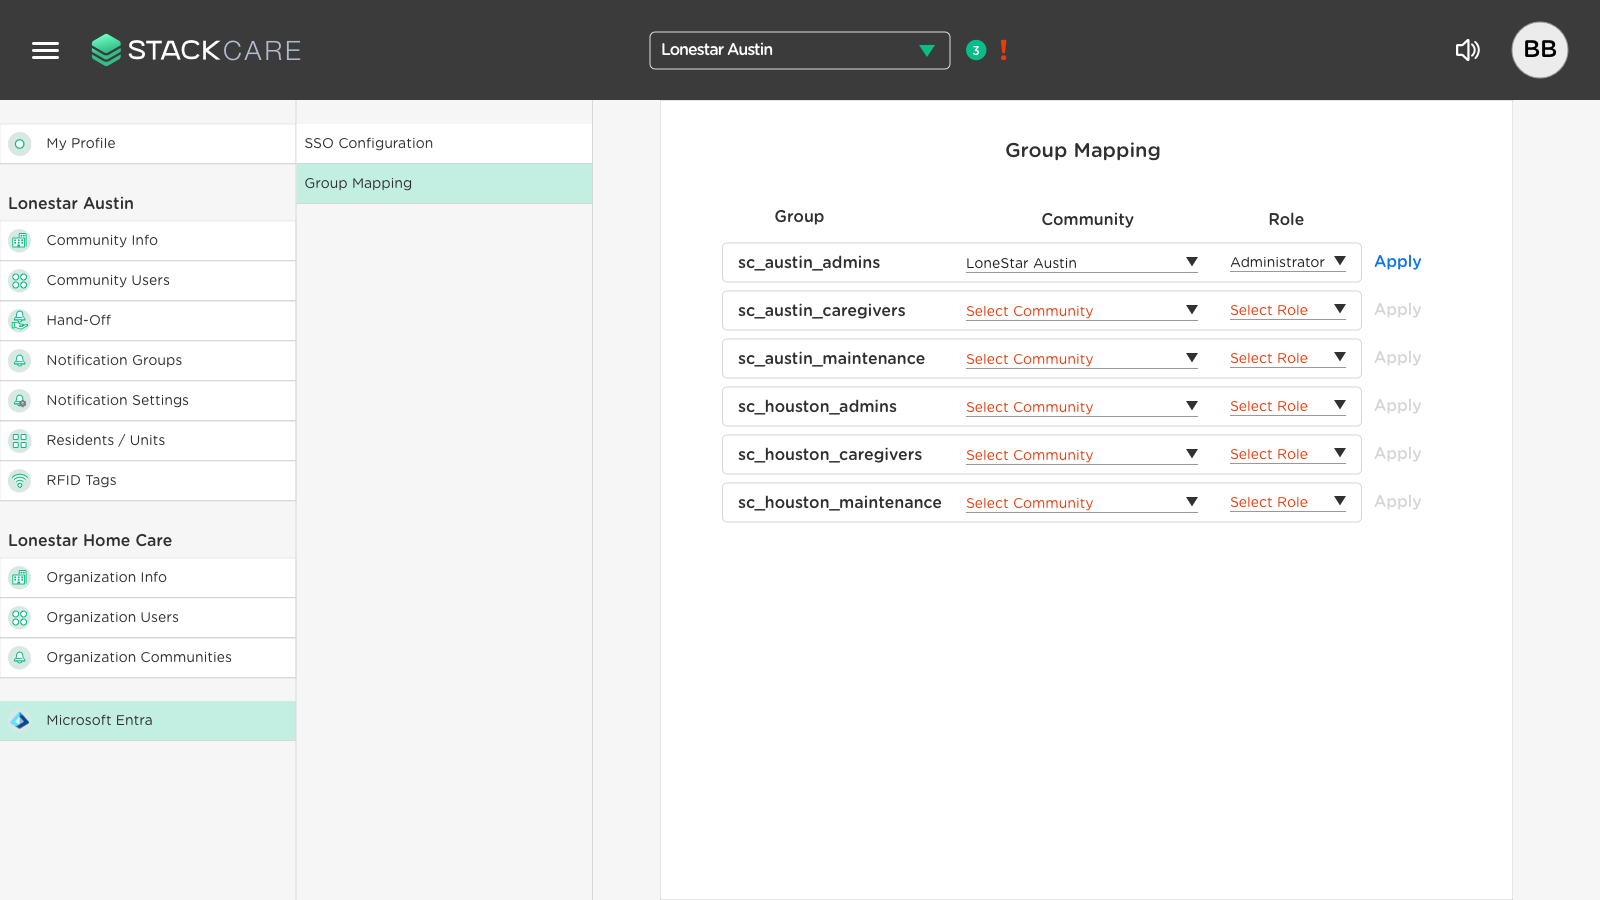
- Complete all desired group mappings.
- Validate that group members are created in their designated communities with the correct role.
- If groups do not appear immediately, wait for the next provisioning cycle or restart provisioning from Microsoft Entra.